Showing posts with label peanut butter. Show all posts

Friday, 20 March 2015

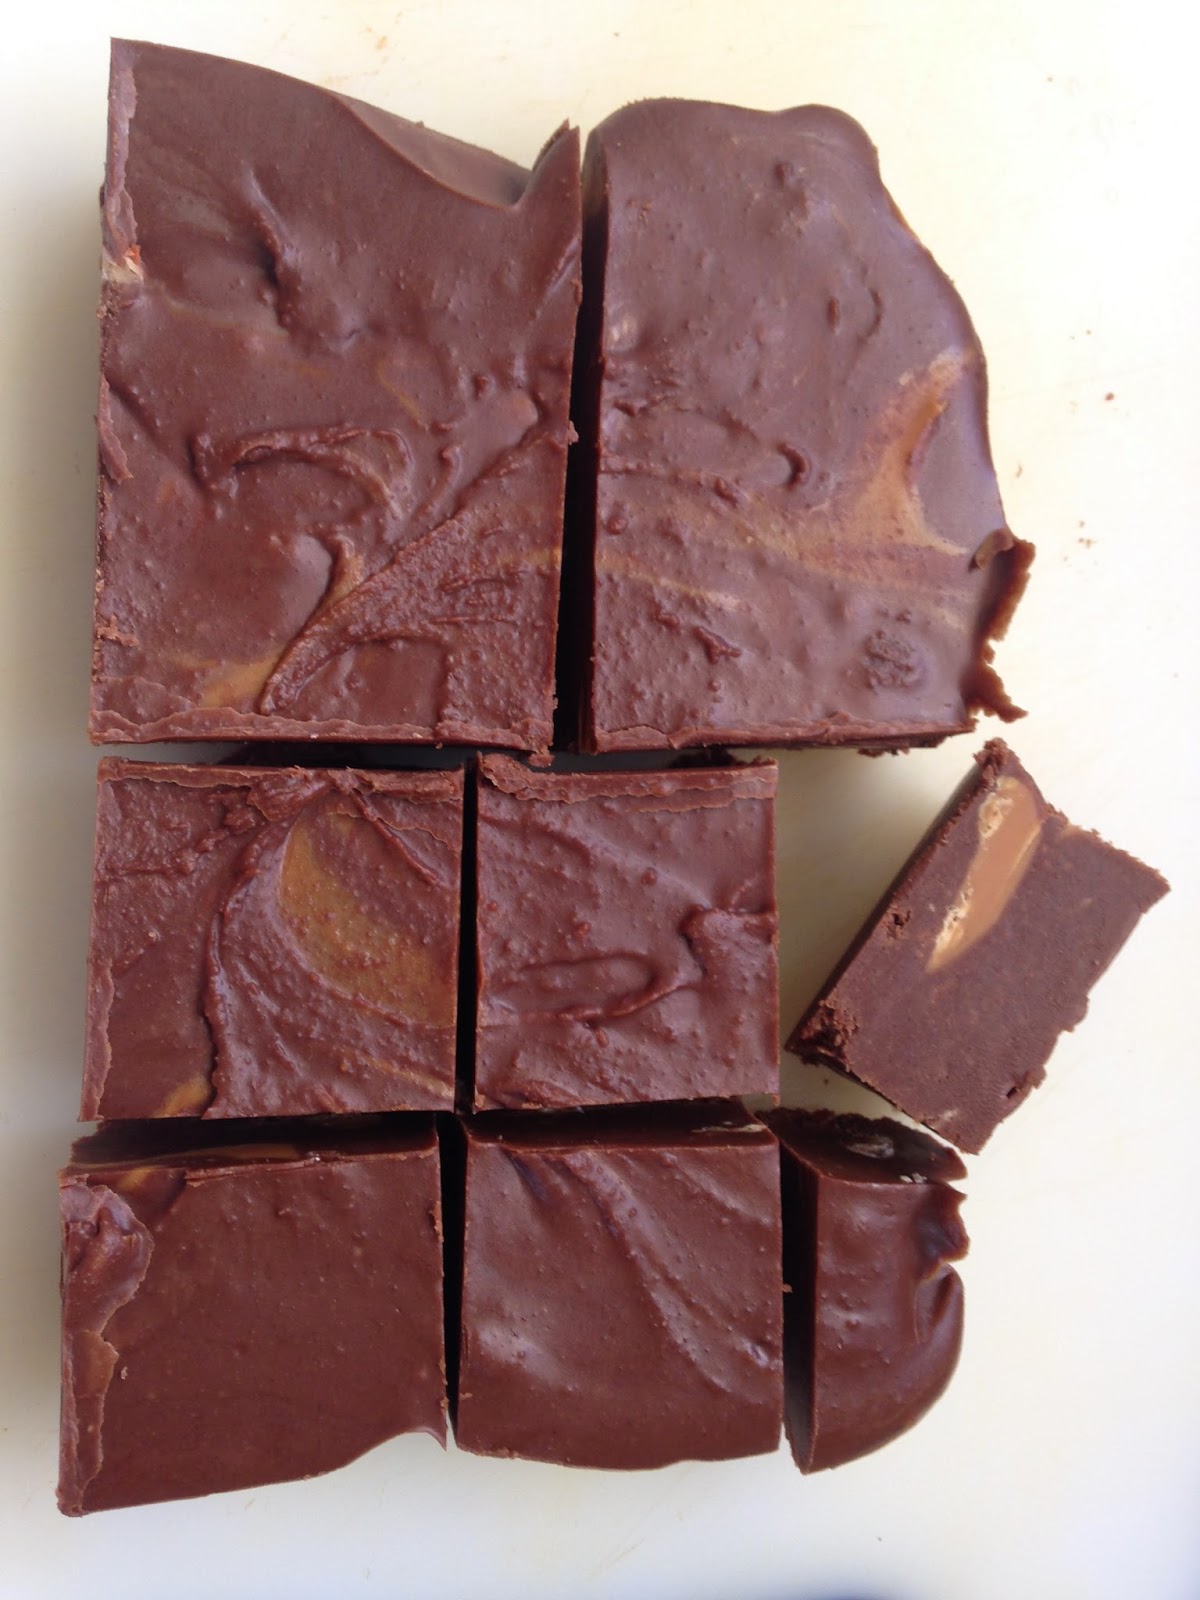
Peanut Butter (Nutter!) Chocolate Fudge

Maybe I should have been born American.

Chocolate and peanut butter - while perfect on their own - are simply heavenly combined. This is not a new revelation (my last post focussed on this same perfect duo). However it presents many opportunities that I am loathe to waste!


 The idea for this (original!) recipe was inspired by the cafĂ© at my workplace. A few weeks ago, I noticed for the first time their decadent chocolate peanut butter fudge. A colleague of mine managed to squeeze the staff for their recipe, which I rated pretty high on the scale of the-perfect-combination-of-sweet-and-peanut. I was surprised to find that, aside from peanut butter, its only ingredients were white and milk chocolate. Those sweet chocolate flavours were dulled down significantly by the smooth p'nutty butter - again I say, the perfect combination!


I'm in that category of people who consider that 'white chocolate' is an oxymoron so I went without the white when trying to replicate this fudge. Plus I wanted to reduce the melty-ness due to high cocoa butter by introducing sugar on its own. Here's my version, in which I used smooth, no-salt and no-sugar peanut butter. Add the sugar slowly - if you want to use sweetened peanut butter you may not need as much so just check the sweetness after each half cup of sugar you add. Crunchy peanut butter is another option, especially if you wish to omit the candy or melts.

Peanut Butter Chocolate Fudge

100g butter
350g Whittakers Dark Cacao chocolate
1 cup peanut butter
3 cups icing sugar, sifted
1 cup of peanut butter melts and candies e.g. Reeses Pieces

Melt the butter and chocolate together in a large saucepan over low heat. Add the peanut butter (still heating) and stir until combined.


I melted the butter on its own to start

350 beautiful, tasty grams...


Remove from heat and add the icing sugar half a cup at a time, tasting each time until preferred sweetness is reached. 

Stir in chopped peanut butter melts and candies if using. Pour mixture into a 9 inch by 13 inch rectangular tin, lined with baking paper. Refrigerate until set then cut into pieces and serve at room temperature.


You can use any peanut butter candies or melts, or even other flavours if you prefer


Before the fudge was set
Delicious 'after' shots!


Sunday, 15 February 2015

{A Summer of Decadent Desserts} Loaded Peanut Butter Chocolate Brownie

In spite of V-Day and all the baking opportunities it brings, I was too busy making cake for the many non-Valentines-related baking opportunities this week. So today's Decadent Dessert actually dates back a few weeks - when it still felt like summer in Christchurch!

I seem to be making a habit of mutilating recipe names for my own purposes. 

The victim of this post is CenterCutCook's Peanut Butter Brownie Dream. Being a sucker for anything to do with brownie and peanut butter (separate AND combined!), I was doubly sucked in by this treat. And I think I spent five minutes looking at that fluffy-yet-decadent peanut butter mousse, trying to work out if I would ever - in my wildest dreams - be able to replicate it. If ever there was an appropriate time to add the word 'loaded' to something, surely this baby is deserving...


By the time I was looking at the ingredients list, there was no turning back. But a disappointment awaited me - in the form of Cool Whip. 'What on earth is that?!' I (and any other Kiwi readers) thought. Well, I'm still not entirely sure. Some sort of stabilised cream, 'loaded' with corn syrup? I was downcast and hopeless, thinking this dessert and I could never be together in the absence of this magical Cool Whip.

But where there's a will there's a... (Cool) Whip? Anyhow, I found that others in the world of blogging have needed to find a replacement for Cool Whip also. The most helpful recipes I found used stabilised cream in place of Cool Whip for desserts like this one. 

Home-made Cool Whip gives the topping dizzying height and delicious fluffiness 
Taking multi-step a bit too far? Maybe, but I believe it's worth it for the unique texture and firmness of that dreamy topping, loaded onto delectable brownie. If it feel like too many steps then you could use a boxed brownie or cake mix for the base instead. Just remember that decadence often benefits from a little more time... hopefully this series of multi-stage recipes convinces you (if you aren't already) that time is a worthwhile investment when baking! And time does not mean complicated, as this recipe is not hard to follow so don't be deceived by the look of the instructions - you can do this!!!

Here are the components and assembly details for making this masterpiece yourself. The brownie base and topping/assemblage recipes are slightly adapted from CenterCutCook - you can check out other great recipe ideas by multi-talented blogger Ashley here.

Chocolate Peanut Butter Brownie Base

Recipe adapted from CenterCutCook. 

1/3 cup good quality dark cocoa powder 
1/2 cup boiling water 
60 g dark chocolate, finely chopped (if you are using a regular cocoa powder you could use milk chocolate instead - make sure it's chopped really small because it will need to melt when mixed with the boiling water)
4 tablespoons (approx. 30 g) unsalted butter, melted (heat the butter, chopped in a heat-proof bowl and covered, for 1 minute in the microwave) 
1/2 cup vegetable oil 
2 eggs 
2 egg yolks 
2 teaspoons vanilla extract 
2 & 1/2 cups sugar 
1 & 3/4 cups plain flour 
3/4 teaspoon salt 
80 g chocolate chips
80 g peanut butter candy melts, roughly chopped (Wilton makes them and in NZ you can get them from some Living & Giving stores or online at Sweet Pea Parties and Cake & Kitchen). If you can't/won't get these melts, just use more chocolate chips or any peanut butter sweets that you can find, like M&Ms or Reeses Pieces).

Pre-heat oven to 180°C with a baking rack at the bottom oven. Line a 9 x 13 inch (23 x 30 cm) pan with baking paper (at the original recipe link you can read about the foil sling that Ashley suggests to make it easier to get the brownie out of the tin. I don't think this quantity requires it but if you are keen have a read!).

In a large bowl, combine the boiling water and the cocoa powder. Use a whisk to stir the mixture until the cocoa powder is dissolved. Add in the finely chopped chocolate, and whisk until all of the chocolate is melted (you may need to cover and leave the mixture for a few minutes to help the chocolate melt - but don't worry if not all the chocolate melts, since there will be choc chips also going into it!). Stir oil and melted butter into the chocolate mixture. 

Place eggs, egg yolks, and vanilla in a small bowl and whisk together for a few seconds to break up the yolks. Whisk the egg and vanilla mixture into the chocolate mixture. Stir in sugar, then sieve in the flour and add the salt. Stir until all ingredients are combined. Fold in the chocolate chips and roughly chopped peanut butter melts, if using.


Any other peanut butter nutters out there?! ;-)
Scrape the batter into the lined baking pan. Gently tap the full pan on the bench top a couple of times to make sure the brownie is spread evenly in the pan.


Bake on the bottom rack of the oven until a toothpick inserted into the brownie pulls out moist crumbs, not quite clean, which should take around 30 minutes depending on your oven. Remove the brownie from the oven and transfer the pan to a wire rack and cool until pan is ok to touch without burning yourself (an hour or so). Lift brownie out of the pan and cool on wire rack for another hour, at room temperature or in refrigerator.

I really like this brownie recipe for several reasons. Because of the seriously dairy-in-ated topping the loaded brownie must be kept in the fridge. This brownie is a good density without too much butter content, which means that it doesn't solidify to rock-solid in the fridge. Also, it leaves you with leftover egg whites, which are always useful if you're stockpiling meringue buttercream icing in your freezer for your next caking occasion...!

Peanut Butter Dream Topping

Recipe adapted from CenterCutCook.

1 cup peanut butter
250 g package of cream cheese, softened 
1 cup icing sugar 
1 x 8 ounce tub Cool Whip, or 250 g home-made Cool Whip (recipe follows).

In the bowl of a stand mixer or a large bowl if using a hand mixer, place the softened cream cheese and beat until light and fluffy. Add in peanut butter and mix at medium speed for a minute to combine. Slowly add in the icing sugar on low speed - mixture will be very thick. Beat in the Cool Whip at low speed until the filling is light and fluffy again.


Final consistency of peanut butter topping
Refrigerate topping until needed. 

Or just eat it now...on its own!

Home-made Cool Whip

Recipe adapted from Something Swanky. Makes enough for one quantity of Peanut Butter Dream Topping plus a little left over which could be frozen or served alongside the loaded brownie.

30 mL (2 tablespoons) cold water
1/2 teaspoon unflavoured gelatine
1/4 teaspoon cream of tartar
220 mL whipping cream
1 & 1/2 tablespoons sugar
1/2 teaspoon vanilla

Pour the water into a small saucepan and sprinkle the gelatine over the water. Let it sit for a couple of minutes then place the pan over medium-low heat and stir until gelatine dissolves. Remove from heat and let cool completely. 

Place one tablespoon of the whipping cream and the cream of tartar in a small zip-lock bag. Seal the bag and shake it until cream of tartar has dissolved completely and there are no lumps. If there are lumps, use your fingers to work them out. 

Pour the cream of tartar mixture into a large bowl (the bowl of your mixer if using a stand mixer) along with the rest of the whipping cream and the sugar. Beat with a hand beater or the whisk attachment on a stand mixer on medium speed for about two minutes. Once the cream mixture begins to slightly thicken, slowly pour in the cooled gelatine mixture while continually mixing. Add the vanilla. Continue to mix until the cream is thick and smooth.

Home-made 'cool whip' a.k.a. stabilised cream

Chocolate Topping 

If desired, use store-bought chocolate sauce or use the following instructions:

Combine equal cup quantities of finely chopped chocolate and simmering hot cream (half a cup of each should be sufficient). Cover for a couple of minutes and stir to combine. Leave to cool a bit before using on loaded brownie so as not to melt the topping.

Assemblage

Spread the peanut butter topping over the cooled brownie layer and place in the refrigerator for at least an hour. 


Just before serving, cut the dessert into small pieces and drizzle with chocolate topping. Store leftovers (if there are any!) covered tightly in the refrigerator.


Tuesday, 3 June 2014

Long Weekend Baking: Brownie Galore and Memorial Day Cupcakes

What better use for a long weekend than some time in the kitchen, baking up a storm. There are few things that make me happier! However a poorly-timed cold/flu took me down during the week so I've been trying not to go crazy with baking, let alone blogging about it. 

('Poorly-timed' because a) when is a cold ever welcome, and b) it was my BIRTHDAY, plus my parents were visiting from out of town. The cold sent my tastebuds AWOL and so I couldn't taste much of the two birthday dinners that I had :( ). 

But..............................................................................................

...would I be an 'irrepressible' baker if I could be stopped?!?!? In addition I have been reminded by a certain faithful reader (my MIL :) that I am overdue for a new post. I've been working myself up to posting about Swiss Meringue Buttercream frosting/icing, but obviously I haven't reached the motivation threshold for that yet. So here's a 'filler' til then - albeit a delicious one!

While Monday (yesterday) was a holiday in NZ known as Queen's Birthday, I hear that those in the States are celebrating Memorial Day around about this time. The main reason I know this is because a friend of ours, an expat American married to a Kiwi lass, had his birthday party this weekend and it was M-Day themed. So we decked out in red, white and blue and I turned out these wee Red, White and Blue Berry Cupcakes.


I used Julie Le Clerc's delicious and super-easy Vanilla Cupcakes recipe from this post, adding about a cup and a half of mixed berries to the batter just before dividing it between cupcake cases. It gave a lovely red and blue tinge to the batter. 


The cupcake/patty pan cases were the closest I had to red, white and blue! The ones with babuska dolls I just couldn't say no to...


Although these cupcakes didn't rise as much as they would have without the addition of berries, they were beautiful and moist.


I iced them with a half-quantity of the regular buttercream (using my favourite margarine as I didn't have any butter softened at the time) from this post by filling a piping bag attached to a size #1M Wilton (large open star) piping tip, and topped with some sweets in suitable colours :)


~~~~~~~~~~ } ~ { ~~~~~~~~~~

Now for her Majesty the Queen, the very best must be presented. The obvious choice (to me) was brownie. What could be more cakey than cake, more chocolatey than chocolate, more decadent than decadence itself?!? Few things in the world can make me happier than a perfectly gooey, yet fully-cooked, fudgey bite finished with a crisp top and chewy underside. I can't imagine a heaven without brownie.

And brownie was also what I promised to make my colleagues at work for my (delayed) birthday morning tea 'shout'. I'm hoping they'll enjoy my efforts with these two amazing flavour combinations!

Bring on the brownie: Peanut Butter & Caramello Chocolate and Raspberry Dark Choc brownies
All I seem to get as gifts these days are recipe books (not that I'm complaining!), and for this birthday just gone my mum got me the fabulous Whittaker’s Passion for Chocolate recipe book. Both my sovereign-worthy brownie recipes were inspired by this fantastic publication.

NB: My conscience has recently been checked in the area of copyrighting. As a result, my general rule will be, if a recipe (that's not my own original - ha!) isn't available on the net/to the general populace by the author themselves, I shouldn't be taking the credit by putting it out there. However...if someone else has already put it there...ahem, may I present, incredibly scrumptious and drool-worthy Peanut Butter Chocolate and Caramel Brownie

The recipe is faithfully produced by those links belonging to the 'someone else's (not me!), but I have a few hints for making it:

  1. Make sure you dissolve all the sugar in the butter and vanilla over the heat at the start, so that you don't find granules in the bottom of the cooked brownie. I did this before adding the peanut butter chocolate so that the chocolate only *just* melted and maintained its gooey peanut buttery nomminess... (sorry got carried away salivating)
  2. Take the chocolate mix off the heat and let it cool for 5 to 10 minutes before adding the eggs. This is more a precautionary step that stems from a childhood nightmarish baking memory of mine, which involved eggs scrambling themselves inside cooked brownie...*shudder-worthy*
  3. If you can't be bothered with (or are a little hesitant about) making your own caramel, you could do as I did and chop up a block of Caramello or other caramel-filled chocolate. I've had (other) bad baking experience where my caramel wouldn't set and my choc-caramel slice failed...so a block of Caramello gifted for my birthday by a thoughtful brother-in-law was the perfect alternative here!
  4. If your oven tends to singe baked goods, make sure you put another tray or container underneath your brownie tray while it's baking to prevent the bottom from burning.

Cadbury and Whittakers, co-existing peacefully
Dark cocoa for seriously dark and decadent brownie
Someone should really stop that chocolate thief...not that I can blame her...er, them...!
All the ingredients (bar the caramel) mixed together.

Caramello dotted through the brownie batter
The delectable final product - fudgey, rich, decadent! Surely fit for a Queen :)

Brownie Number Two: Raspberry and Dark Chocolate. I've heard that this recipe is the 'best in NZ' but I shirked the 7 eggs it takes (although it probably feeds an army - let me know if you ever try it out!). So instead I tried the NZ Women's Weekly version (4 eggs) and it worked a treat :-) No shortcuts this time!

Raspberries dotted on top - attractive, healthy and oh-so-tasty!
The perfect dessert - brownie, brownie and more brownie (how could her Majesty not approve?!)
Hope you had a great long weekend and that you got some time to bake up some celebratory treats - or even to have a right royal rest! 

xo Claire