Showing posts with label baked. Show all posts

Saturday, 19 December 2015

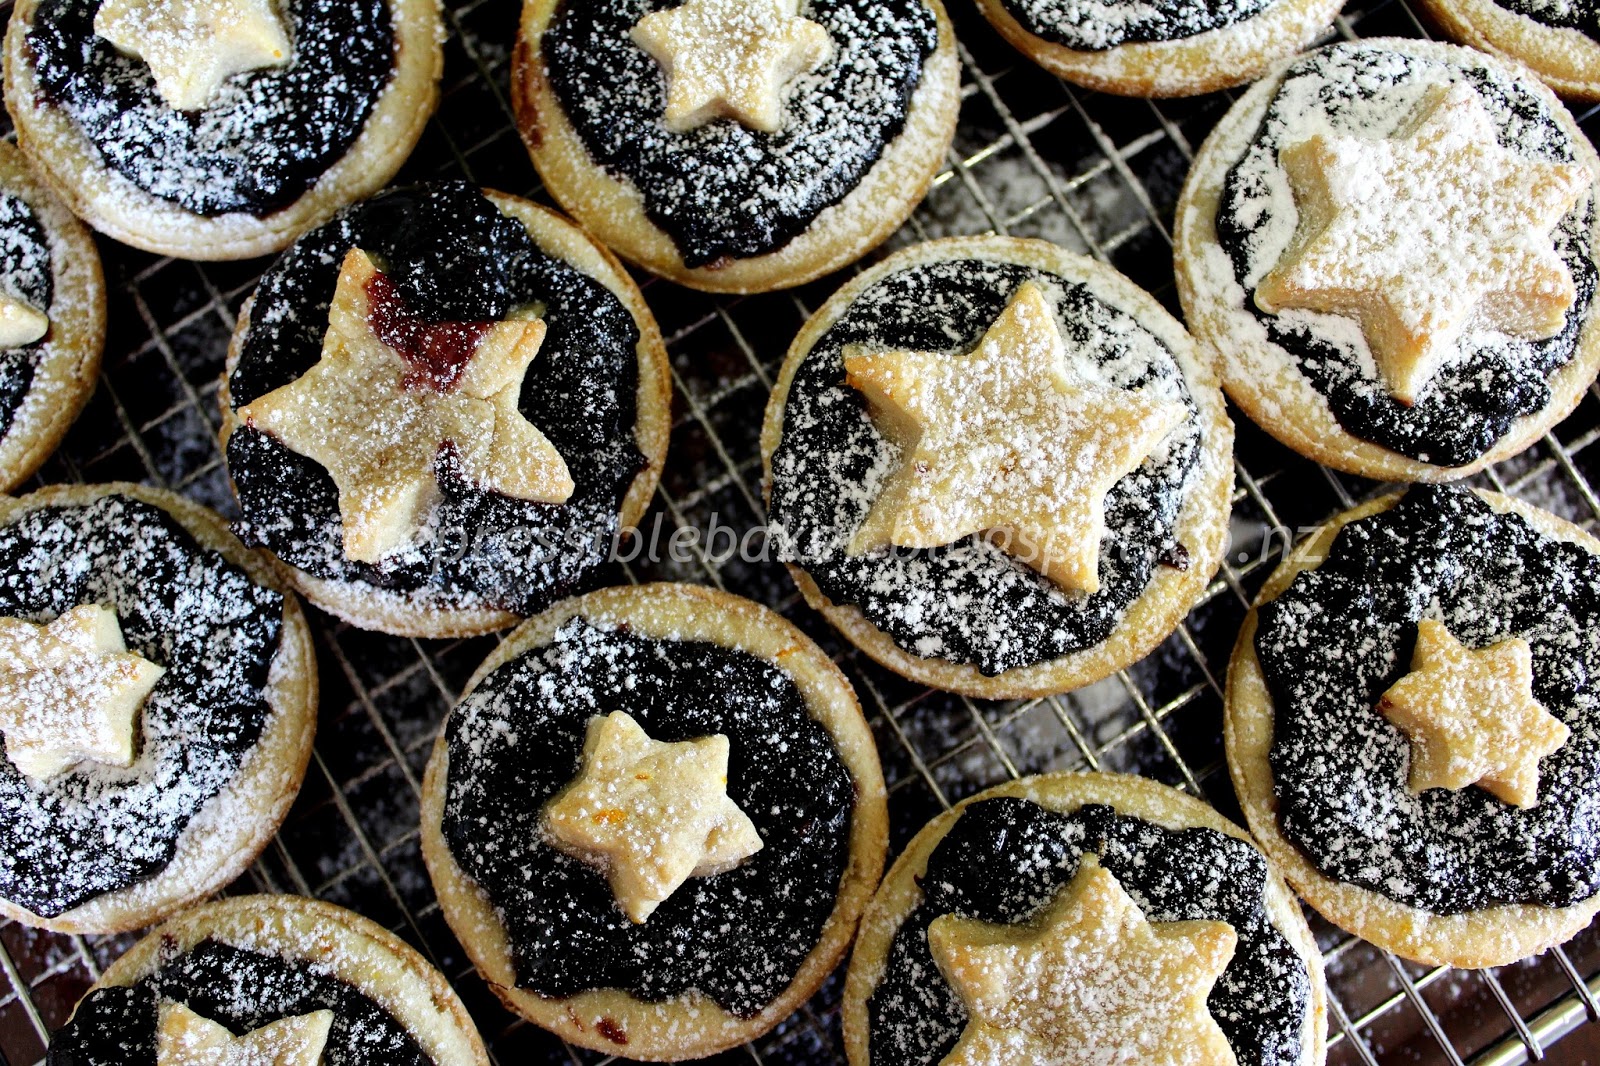
Berry and Orange Zest Christmas Mince Pies

'Tis the season to be baking! Nothing quite compares to the variety of treats specific to the Christmas season to motivate me to drop all other projects. And to indulge in a bit of nostalgia...


Over the years the way I've celebrated Christmas has changed as the family that I spend it with changes. A combination of others and me growing older and moving through different life stages, and I'm pretty sure I'm not the only one who experiences that!

But we all have things that just seem indispensable to the season: "it wouldn't be Christmas without..."

For me those things would be... the smell of real pine on the tree decorations (even though Mum has had a fake tree for years!); giving hints for months about what gifts I would like to whoever would listen; listening to Clement C. Moore's 'Twas the Night Before Christmas' on Christmas Eve with my sister; singing 'O Come All Ye Faithful' while carolling for the elderly with my Grandma, and biting into her Christmas fruit mince pies on Boxing Day.

Image from http://www.ifihadamillionhours.wordpress.com

I do miss some of those old Christmas traditions, most especially Grandma's pies! 

I recently found out how divisive fruit mince pies can be: several of my workmates denounced them for their fruitiness and another called them "fly cemeteries"! However I refused to be discouraged and finally decided this year to bring back these humble pies back into my Christmas celebrations.


However, I have a few tricks up my sleeve to make them more appealing: berry-based fruit mince from Anathoth with boysenberries and blackcurrants, and some tangy orange zest and spices for the pastry.


For the shortcrust pastry I wanted a rich, thick, crisp pastry like my Grandma would make, so I minimally adapted Jamie Oliver's sweet shortcrust recipe. The recipe in full is below so that it's easy to follow. While my Grandma used to make fully-encased fruit pies, I was enchanted by the star-topped mince pies that I found on Nigella Lawson's website, so I made mine like that, but you would have enough pastry to give yours proper lids if you doubled ingredients for the pastry.


The key to pastry, it seems, is keeping it cold; use cold butter, keep your hands cold by washing them in cold water before touching the pastry, refrigerate the pastry before using (and even at stages while making it if you like).  I was lucky to have a cooler day to make it! Jamie's comments for his recipe encourage you not to over-work the pastry to make sure it results in a flaky crust. It was lighter/less rich than my Grandma's version, but with all the sweet goodies around at this time of the year I'm probably better off!

I hope you get a chance to create your own homemade Christmas treats, and that you're inspired by this recipe to add some tangy flavours for memorable mouthfuls.

Berry and Orange Zest Christmas Mince Pies

250g plain flour (approx. 1 & 1/2 c) plus extra to flour bench and rolling pin
50g icing sugar (approx. 1/3 c) plus extra to dust pies with
125g unsalted butter, cold and cubed small
zest of one orange
1 & 1/2 tsp cinnamon
1 tsp ginger
1 large egg
Splash of milk
One 435g pottle of Anathoth Fruit Mince Berry Fruits (or your own homemade fruit mince concoction!) 

Sieve the flour and icing sugar "from a height" into a deep bowl.


Add the cubed butter and use your (cold!) hands (or a pastry cutter to start with as I did - though if the cubes are small enough you might not need to) to rub the butter into the flour and sugar. Use your fingers and thumbs rather than your palms, as they are warmer.


Keep going until the mixture is like fine breadcrumbs. Add the orange zest and spices, using your fingers to combine these ingredients, especially to make sure you don't get clumps of orange zest. At this point I put the bowl in the fridge to firm up the butter within it again.

Combine the egg and milk in a small jug/cup/bowl. Make a well in the centre of the butter-flour mixture and pour the milky egg into it. Use a metal spoon to mix together until it gets too thick to continue, then use your hands to work the mixture into a dough by kneading it lightly to combine all the dry crumbs into one ball. Wrap the dough in clingfilm and refrigerate for half an hour.


Lightly flour a 12-hole muffin tray or tart tin. Remove the dough from the fridge and knead with floured hands for a minute on a floured surface, long enough to make it *just* easy enough to roll out but still cold. Rub flour on your rolling pin and roll out the dough to approx. 5mm thickness.


Cut out 12 rounds from the pastry dough using a round cookie cutter (which could be a cup like the one I used!) with a diameter a couple of centimetres wider than the base of the muffin/tart cavities in your tray.


Push each round into each floured muffin/tart cavity - the pastry will only come up the sides a short way.


Spoon one tablespoon of fruit mince into each pie case.


Re-knead the remaining pastry, roll out and cut 12 stars using a cookie cutter(s) no wider than the diameter of the round cookie cutter used for the pastry cases. Place one on top of each fruit mince pie.


Bake at 200 degrees Celsius (conventional oven) for 15 minutes. Cool a bit before removing from the tins with a fork. Eat warm or at room temperature, dusted with icing sugar.

Note: The instructions above produce 12 pies. If using the Anathoth fruit mince, you will have enough mince to make around 18 pies; you can double the pastry ingredients and have enough pastry to make 18 pies with some pastry left over. Alternatively, double the pastry ingredients anyway and cut rounds instead of stars to encase the fruit in the pies, using a fork or your fingers to attach the top rounds to the bases.


The past few years I've been with my husband's family at Christmas time and really enjoyed getting to know their traditions for the holiday season, and even making my own traditions.

In addition to making these pies, my favourite new tradition is to attend our church's Christmas Eve service to marvel at how the God who made the world came to earth as a tiny, vulnerable baby, to be the Saviour of the world. The stars on these pies make me think of the bright star that led the wise men that first Christmas, and the wonder they must have felt when they met the King of kings. My hope is that, amidst the happy trappings of the season this year, you're drawn to ponder that first Christmas and how it might shape your history.

Saturday, 31 October 2015

Three Weddings and A... (Birthday) Cake! {B-Day Cake At Last}

I try to publish something on this blog at least once a month - and my biggest motivator is my lovely MIL who asks me regularly when my next post will be up :-) Even though I've ended up on Oct 31sh with a not very Halloween-y post, I'm glad for the inspiration from my family to keep blogging regardless of the season! 

For my MIL's birthday last year (celebrated along with two other family members' birthdays), I made my first two-tier cake.

For the trifecta birthdays this year, I made three spring-themed tiers (slightly early, as it was the end of July). Finally, here is the birthday cake that brings this seriously long-spanning four post series of 'Three Weddings and A... (Birthday) Cake! to an end - just in time for the next wedding season...
 
Bursting into spring on a sunshiny day...
I'm pleased to say that the design for this cake was my own, with a lot of inspo from a set of craft stencils that I scored from a newsagents' in Fairlie.


I'll keep the details as to-the-point as my detail-loving brain will allow: the top tier was chocolate (I think, although my notes say carrot...) with Swiss meringue filling and icing, and decorated hand-painted fondant clouds - thanks to my happy helper E!


The middle tier was red velvet, poorly covered in white choc ganache - I say poorly because the red velvet leakage that ensued could have been prevented if I had been more careful and not left any gaps! The escaped moisture also made the outer layer of fondant soft and prone to mishaping (as seen in image below)... My near-despair was topped off by my lack of consideration for the thickness of the fondant in the overall design, meaning this tier was almost the same size as the bottom tier.

Well, I guess if everything was done right the first time then the world wouldn't be such an interesting place ;-) At least the hand-painted little birdy looked happy with his outlook! I traced the stencil design onto baking paper which I then stuck onto the fondant surface and lightly traced over to leave an indentation for painting. Gel paints mixed with cake decorator's fluid did the trick to colour between the lines. 


Lastly the bottom tier was made of delicious preserved ginger cake covered in chocolate ganache with green grass done with royal icing (by eye).
 

Whew! It was a big effort, and the unseasonably hot weather on the day of the birthdays celebration was an unexpected challenge for the buttercream to keep its shape. But sunshine like that and a cake like this, how could we not have been hopeful for an early spring?!
 
 
I'm looking forward to next year's birthday cake challenge - though in future I'll try not to challenge them all to eat so much cake (sorry guys, quality not quantity!) ;-)


Friday, 21 August 2015

Three Weddings and a... Birthday (Cake!) {Wedding No.3}

Nothing like a sick day off work to remind me I have some blogging to catch up on - it would be wrong to just leave things hanging half-way through 'Three Weddings and a Birthday Cake', right?! 

After this wee series I PROMISE to put some actual, rustic, homemade, genuine baking ideas up; even I can't look at cake decorating inspo all day. 

Well, except maybe on sick days... in between binge-watching the latest two seasons of Rookie Blue (I feel totally ok if the series isn't renewed after the Season 6 finale, I'm in a good space right now). 

Ahem, so, cake!

Wedding Cake No.3: Naked Glory

When someone mentions a 'naked cake', what comes to mind? Probably a number of dodgy things, but I want to change those connotations to positive ones... think of something like this instead:


Naked cake by BakerMama

That delightful number was C & K's inspiration cake for their wedding at ANZAC weekend this year. My third wedding cake ever, this one was to be the most 'organic' design - so natural compared to the thick layers of fondant, and less piled-on than the buttercream-slathered look. Naked cakes typically have little shaping done to them, the filling between layers is visible and the barest amount of icing is smoothed around the outside (kind of like a light dusting of snow!). Topped with fruit or flowers, no cake could be fresher!

C & K love Chocolate Guinness cake (and each other of course! <3) so the base of their cake had to be that flavour. Classic carrot cake (I believe I used Annabel Langbein's recipe) won out for the middle tier, and some lovely and light lemon poppyseed for the top tier. Given that I had only ever seen naked cakes made with the same flavour (or at least the same colour) for each tier, I did a practice run of the cake...


For this practice cake I used three different covering methods: naturally oozing filling (bottom tier), scraped filling (top) and 'snow dusted' like the inspo cake for the middle tier. C & K stuck to their guns and decided to go with the latter, and liked my garden flower arrangements enough to entrust me with the task of preparing the decorations as well!

So off I went to make 12 inch, 9 inch and 6 inch cake rounds... 

... And to sing to the flowers in my wee garden, in hope they would be blooming at the time of the wedding (an end-of-April wedding could be a chilly autumn event in New Zealand). 

Fortunately, my singing didn't shrivel the flowers, but I did have some trouble with one of the carrot cake layers under-cooking, hence the middle layer is not as tall as I would have liked. Still, the three tiers you see here were served along with two slab cakes (one each Choc Guinness and carrot), so there was plenty of cake irrespective!


My tree trunk cake stand was made for such a rustic, natural cake as this!


The gorgeous white frilly lily-like flowers along with the lovely soft pink rosebuds came from our neighbours garden, after she had heard of my weekend caking requirements! The blue daisy ones are from my Felicia bush, the small blue ones are from a ground cover with blue star-shaped blooms, the pastel purple ones are geraniums, I threw in some smaller pink camellia blooms, and some jasmine leaves make up the foliage.


Love those white ones!
It was a pleasure to be involved in the wedding of these two young love birds and to learn a new cake design at the same time :-)


Sunday, 21 June 2015

Three Weddings And A... Birthday (Cake!) {Wedding No. 2}

After that brief interlude by IBS-bleh, we're back to IBS-bake and therefore cake! I've been busy with birthday cakes lately - hopefully photos to come in a post of their own, but first I must report on the promised wedding cakes...

Wedding No.2: C + I = Buttercream Seascape

This wedding cake was for my (very trusting!) friend C and her fiancé who were married at Easter weekend. Their stunning inspiration photo was this one below. Unfortunately I don't have the credit details at hand - it seems to originate on OneWed but they don't list the source... I've asked the site moderators for the credit info and will update if I get a response. 


Creator unknown - found on OneWed
Goes to show how important it can be to watermark your work! I've used PicMonkey to mark the photos that follow, on the recommendation from the wise and wonderful Rose of Rose Bakes. She provides some super-simple instructions that helped me a lot here. Also, she makes gorgeous and clever cakes that you should definitely check out!

I must add that the bride's talented friend M created the stunning sugar sunflowers and foliage, travelled hours with them by car and attached them just before the reception - legendary work!!! Despite neither her nor I knowing what the other was going to do, I think that both cake and decorations looked beautiful together.

This cake had to serve approx. 120 guests so a single-tier like the one above wasn't going to cut it. In fact, it took a 12 inch carrot cake, a 10 inch passionfruit buttermilk cake and an 8 inch rich chocolate mud cake, as well a sheet cake also in the mud cake flavour to provide enough dessert for the guests. Not as delicate as the inspo cake, but with the sunset-over-the-ocean theme of the wedding, I tried to create an ombré effect of waves with foamy tops. In the first picture below you can compare it to the real waves and decide for yourself how I did!


Super shiny Swiss meringue buttercream!
From another angle, the icing pattern looks more frothy and its colour looks better blended (something that I realised I need more practice at!). 


View from the top
Now I'm just playing with my new camera for lighting fun!
If I'd had more time I would have liked to pipe around the cake boards between layers but it was a bit of a rush once we got into the venue, especially to get the beautiful decorations on, so I hope it didn't detract from the overall effect. Here's the fully decorated cake:


Yes, I played around with the contrast in this pic and I don't regret it at all!!
I love the lighting in this picture - and the detail in those sunflowers!

Here are the cakey details for anyone interested:

  • I used the Chelsea Sugar carrot cake recipe, but as is this is prone to under-cooking in my very average oven, I've since switched to an Annabel Langbein recipe. For the filling, I used my favourite recipe for super-stable cream cheese icing from Rose Bakes with a little lemon rind added.
  • The passionfruit buttermilk cake is a Women's Weekly recipe that I have recently come across - very dense but with a nice fresh flavour from the passionfruit. It was filled with a store-bought passionfruit curd (us working gals have to take shortcuts somewhere!) but unfortunately the layers were prone to sliding as a result, since the curd reduced friction between them. Next time I'd recommend a passionfruit buttercream instead.
  • For the chocolate cakes I used another Chelsea recipe - it still produces a spongy chocolate cake texture rather than a thick brownie-like one. Which is totally fine if you want rich chocolate flavour which still looks like cake! Simple white chocolate ganache filled these chocolate layers.
  • The Swiss meringue buttercream was made the cheat's way that has changed my life (which one day I will add to my SMBC post...) in copious quantities - 4.9 times the recipe at that link to be precise! After crumb-coating the cakes, I coloured the rest of the icing four separate shades of blue, which took more Wilton Sky Blue gel colour than you would imagine given the pastel shade. And I used two shades on each layer, obviously the lighter on the top half and the darker on the bottom. I was washing blue colouring off everything in sight for days!
  • Note: 12 inch cakes are heavy and need to be firmly attached to their base board - this one wasn't and went for a little slide into the side of its carry box in the car on the way. Fortunately buttercream is very forgiving and fixable!!

The bride and groom seemed to have a great time - I was glad to be able to contribute to their happiness in this way on their special day :-)


Sunday, 15 February 2015

{A Summer of Decadent Desserts} Loaded Peanut Butter Chocolate Brownie

In spite of V-Day and all the baking opportunities it brings, I was too busy making cake for the many non-Valentines-related baking opportunities this week. So today's Decadent Dessert actually dates back a few weeks - when it still felt like summer in Christchurch!

I seem to be making a habit of mutilating recipe names for my own purposes. 

The victim of this post is CenterCutCook's Peanut Butter Brownie Dream. Being a sucker for anything to do with brownie and peanut butter (separate AND combined!), I was doubly sucked in by this treat. And I think I spent five minutes looking at that fluffy-yet-decadent peanut butter mousse, trying to work out if I would ever - in my wildest dreams - be able to replicate it. If ever there was an appropriate time to add the word 'loaded' to something, surely this baby is deserving...


By the time I was looking at the ingredients list, there was no turning back. But a disappointment awaited me - in the form of Cool Whip. 'What on earth is that?!' I (and any other Kiwi readers) thought. Well, I'm still not entirely sure. Some sort of stabilised cream, 'loaded' with corn syrup? I was downcast and hopeless, thinking this dessert and I could never be together in the absence of this magical Cool Whip.

But where there's a will there's a... (Cool) Whip? Anyhow, I found that others in the world of blogging have needed to find a replacement for Cool Whip also. The most helpful recipes I found used stabilised cream in place of Cool Whip for desserts like this one. 

Home-made Cool Whip gives the topping dizzying height and delicious fluffiness 
Taking multi-step a bit too far? Maybe, but I believe it's worth it for the unique texture and firmness of that dreamy topping, loaded onto delectable brownie. If it feel like too many steps then you could use a boxed brownie or cake mix for the base instead. Just remember that decadence often benefits from a little more time... hopefully this series of multi-stage recipes convinces you (if you aren't already) that time is a worthwhile investment when baking! And time does not mean complicated, as this recipe is not hard to follow so don't be deceived by the look of the instructions - you can do this!!!

Here are the components and assembly details for making this masterpiece yourself. The brownie base and topping/assemblage recipes are slightly adapted from CenterCutCook - you can check out other great recipe ideas by multi-talented blogger Ashley here.

Chocolate Peanut Butter Brownie Base

Recipe adapted from CenterCutCook. 

1/3 cup good quality dark cocoa powder 
1/2 cup boiling water 
60 g dark chocolate, finely chopped (if you are using a regular cocoa powder you could use milk chocolate instead - make sure it's chopped really small because it will need to melt when mixed with the boiling water)
4 tablespoons (approx. 30 g) unsalted butter, melted (heat the butter, chopped in a heat-proof bowl and covered, for 1 minute in the microwave) 
1/2 cup vegetable oil 
2 eggs 
2 egg yolks 
2 teaspoons vanilla extract 
2 & 1/2 cups sugar 
1 & 3/4 cups plain flour 
3/4 teaspoon salt 
80 g chocolate chips
80 g peanut butter candy melts, roughly chopped (Wilton makes them and in NZ you can get them from some Living & Giving stores or online at Sweet Pea Parties and Cake & Kitchen). If you can't/won't get these melts, just use more chocolate chips or any peanut butter sweets that you can find, like M&Ms or Reeses Pieces).

Pre-heat oven to 180°C with a baking rack at the bottom oven. Line a 9 x 13 inch (23 x 30 cm) pan with baking paper (at the original recipe link you can read about the foil sling that Ashley suggests to make it easier to get the brownie out of the tin. I don't think this quantity requires it but if you are keen have a read!).

In a large bowl, combine the boiling water and the cocoa powder. Use a whisk to stir the mixture until the cocoa powder is dissolved. Add in the finely chopped chocolate, and whisk until all of the chocolate is melted (you may need to cover and leave the mixture for a few minutes to help the chocolate melt - but don't worry if not all the chocolate melts, since there will be choc chips also going into it!). Stir oil and melted butter into the chocolate mixture. 

Place eggs, egg yolks, and vanilla in a small bowl and whisk together for a few seconds to break up the yolks. Whisk the egg and vanilla mixture into the chocolate mixture. Stir in sugar, then sieve in the flour and add the salt. Stir until all ingredients are combined. Fold in the chocolate chips and roughly chopped peanut butter melts, if using.


Any other peanut butter nutters out there?! ;-)
Scrape the batter into the lined baking pan. Gently tap the full pan on the bench top a couple of times to make sure the brownie is spread evenly in the pan.


Bake on the bottom rack of the oven until a toothpick inserted into the brownie pulls out moist crumbs, not quite clean, which should take around 30 minutes depending on your oven. Remove the brownie from the oven and transfer the pan to a wire rack and cool until pan is ok to touch without burning yourself (an hour or so). Lift brownie out of the pan and cool on wire rack for another hour, at room temperature or in refrigerator.

I really like this brownie recipe for several reasons. Because of the seriously dairy-in-ated topping the loaded brownie must be kept in the fridge. This brownie is a good density without too much butter content, which means that it doesn't solidify to rock-solid in the fridge. Also, it leaves you with leftover egg whites, which are always useful if you're stockpiling meringue buttercream icing in your freezer for your next caking occasion...!

Peanut Butter Dream Topping

Recipe adapted from CenterCutCook.

1 cup peanut butter
250 g package of cream cheese, softened 
1 cup icing sugar 
1 x 8 ounce tub Cool Whip, or 250 g home-made Cool Whip (recipe follows).

In the bowl of a stand mixer or a large bowl if using a hand mixer, place the softened cream cheese and beat until light and fluffy. Add in peanut butter and mix at medium speed for a minute to combine. Slowly add in the icing sugar on low speed - mixture will be very thick. Beat in the Cool Whip at low speed until the filling is light and fluffy again.


Final consistency of peanut butter topping
Refrigerate topping until needed. 

Or just eat it now...on its own!

Home-made Cool Whip

Recipe adapted from Something Swanky. Makes enough for one quantity of Peanut Butter Dream Topping plus a little left over which could be frozen or served alongside the loaded brownie.

30 mL (2 tablespoons) cold water
1/2 teaspoon unflavoured gelatine
1/4 teaspoon cream of tartar
220 mL whipping cream
1 & 1/2 tablespoons sugar
1/2 teaspoon vanilla

Pour the water into a small saucepan and sprinkle the gelatine over the water. Let it sit for a couple of minutes then place the pan over medium-low heat and stir until gelatine dissolves. Remove from heat and let cool completely. 

Place one tablespoon of the whipping cream and the cream of tartar in a small zip-lock bag. Seal the bag and shake it until cream of tartar has dissolved completely and there are no lumps. If there are lumps, use your fingers to work them out. 

Pour the cream of tartar mixture into a large bowl (the bowl of your mixer if using a stand mixer) along with the rest of the whipping cream and the sugar. Beat with a hand beater or the whisk attachment on a stand mixer on medium speed for about two minutes. Once the cream mixture begins to slightly thicken, slowly pour in the cooled gelatine mixture while continually mixing. Add the vanilla. Continue to mix until the cream is thick and smooth.

Home-made 'cool whip' a.k.a. stabilised cream

Chocolate Topping 

If desired, use store-bought chocolate sauce or use the following instructions:

Combine equal cup quantities of finely chopped chocolate and simmering hot cream (half a cup of each should be sufficient). Cover for a couple of minutes and stir to combine. Leave to cool a bit before using on loaded brownie so as not to melt the topping.

Assemblage

Spread the peanut butter topping over the cooled brownie layer and place in the refrigerator for at least an hour. 


Just before serving, cut the dessert into small pieces and drizzle with chocolate topping. Store leftovers (if there are any!) covered tightly in the refrigerator.